Documentation
Please see the download section for what you need to download and install. Once that is done you should launch Eclipse and select 'Window -> Open Perspective -> Other...'. Then select 'SLIDE'.
(Click on each image for a larger view.)
Creating a New Project
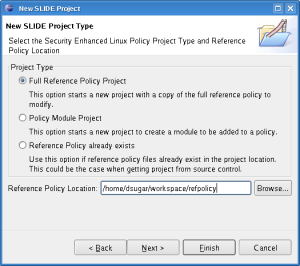
Start by File->New Project Select 'SLIDE Project' This will walk through the process of creating a new project. The first page is the typical project creation page prompting for the name and location of the new project. Next you will prompted for the type of project.
Your project type choices are:
- Full Reference Policy — With this type of project the full reference policy is copied into the project location and you are able to modify the policy to fit your needs. This choice requires that you have downloaded the full reference policy source code to your machine.
- Policy Module Project — This type of project references full policy source or installed policy headers. Policy headers are typically installed in /usr/share/selinux.
- Reference Policy Already exists — A more advanced option if you are getting reference policy from a version control system or it already exists in the project location.
For the first two choices you must specify the location of the policy. Again in the first case it will be copied and in the second case it is just keeping a reference.
For the first choice there is an additional screen of some advanced options to allow you to skip copying some files that you may not need. For example special version control files that shouldn't be copied.
Working in the IDE
Once your project has been created you can use the 'Policy Explorer' (default left side panel of workspace) to navigate through the policy. This view is designed to show you only files related to the source of the policy. By double clicking on a module it will be opened in the Module Editor (by default in the center of the workspace).
- Module Editor is a tabbed editor with each tab representing a file in the module. The 'Type Enforcement' tab edits the .te file, the 'Interfaces' tab edits the .if file, and the 'File Contents' tab edits the .fc file.
- Interfaces (default right side panel of workspace) shows a list of the modules in the policy and helps locate documentation to find interfaces. By entering text into the filter you can limit the number of interfaces listed to assist in finding the interface needed. You can then right click on an interface to add it into the current module.
- Declaration view shows the interfaces into a module to aide in the policy writing process.
- Console view shows the output from the compilation of the policy files
- Search view is a standard Eclipse view which shows the results of any search performed
Creating New Modules
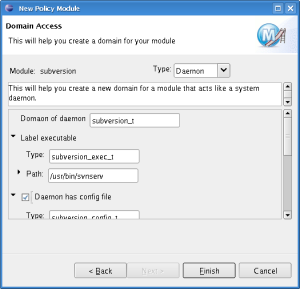
To help with creating new modules there is the new module wizard. You get to this by selecting 'File -> New', then 'SLIDE Module'. Select the project you want to add the module into (required). Fill in the name of the new module you are creating. Select the layer (optional if you are working on a module project referencing headers). You can either select a layer that already exists or type in a new layer. Fill in the summary for the layer (required) and the version (required). The description is optional but you should fill it in to help others know what your module does.
If you press 'Finish' now and it will create mostly balnk module files for you. The information inserted will be the documentation (in correctly formed XML) and update the modules.conf file.
You can continue onto the next page in the wizard to select default policy code that can be automatically generated. You choose the policy to create based on your selections in the list. Expand dropdown to show sub-items. All paths are optional, but if you don't fill them in the entry will not be created in the file context (.fc) file. There are three templates to choose from:
- Application — Module for an user launched application processes.
- Daemon — Module for a daemon process started by init or xinetd
- None — Module with no additional policy created
Creating Interfaces
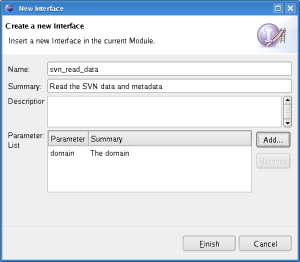
To help with creating new interfaces there is a New Interface Wizard. You get to this by right clicking in the 'Interfaces' editor (or an .if file) and select 'Create Interface...'. You fill in the interface name, summary, description (optionally) and parameter. Then add parameters (name and description). When you press 'Finish' it will generate the 'interface' block along with the comments in correctly formed XML.
Project Properties
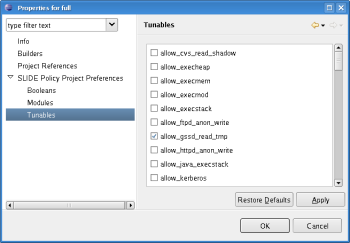
By right clicking on the project and selecting the 'Properties' choice (or menu 'Project -> Properties') you get to the project properties. In here you have the ability to reset the reference policy (for a module project). Modify the build.conf file in a GUI editor. In addition the ability to edit booleans.conf, tunables.conf, and modules.conf based on the type of project. For referenced policy some of these things might not be editable.
Plugin Preferences
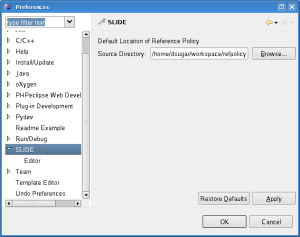
The SLIDE plugin preferences allow you to set a default reference policy location and features of the editor including coloring and functionality. You get to the preferences from the menu 'Window -> Preferences', the select 'SLIDE Preferences'.
Search
The plugin adds a new tab into the standard Eclipse search dialog to allow you to easily search through the policy for specific type and declarations. The search results show up in the standard Eclipse 'Search' view. The search is broken down into three sections:
- Type Enforcement to search the type enforcement (.te) files
- Interface to search the interface (.if) files
- File Context to search the file context (.fc) files
Type Enforcement:
- Type Declaration will search for the declaration of a type that contains the text entered
- Interface call will search for a call to an interface containing the text entered
- Access Vector will search for an access vector containing the text entered
Interface:
- By Name will search for an interface declaration the contains the text entered
- By Summary will search in interface summaries for the text entered
- By Description will search in interface descriptions for the text entered
- Containing Type will search through interface for types required that contain the text entered
File Context:
- User will search for file contexts that contain text entered in the user field
- Role will search for file contexts that contain text entered in the role field
- Type will search for file contexts that contain text entered in the type field
- MCS Level will search for file contexts that contain text entered in the mcs field
- Matching Path will search for file contexts where the path matches a path entered in the text field. This will find partial path matches, not just the one specific path that will label the path entered
